
Stain creates a realistic stain effect in the shape of any selection. You can emulate spaghetti sauce, coffee cup rings, motor oil, sweat and more!
Note: Use Stain with a selection to get the best effect. Using Stain without a selection fills the entire image or, with Ring Stain selected, creates a border around the edge of an image.
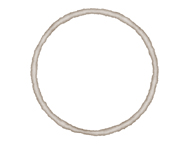
Select this check box to apply the stain effect to the area around your selection boundary. For example, applying Stain to a circular selection with Ring Stain selected creates a stained loop, like a coffee mug might leave behind.
Clearing the Ring Stain check box fills the ring using the color selected in Stain Color and opacity levels set with the Internal Opacity and Overall Opacity sliders.

Specifies the width of the opacity drop-off, which forms the stain effect. Higher values produce a wider stain.
Controls the roughness of the stain edge; higher values produce an increasingly jagged edge.
Controls the transparency of the inner part of the stain. Higher values increase the opacity of the stain’s interior.
Controls the opacity of the entire stain effect. Higher values darken the stain effect and interior opacity (if an internal opacity above one has been specified).
The stain can be any color you like. Clicking in this box awakens your slumbering color picker.
Controls the random element in the creation of this effect. Minor changes in the Random Seed setting can produce dramatic changes in your image; we encourage you to experiment with this control until you find the effects you like best. You can then precisely duplicate the effect by saving the Random Seed setting.
![]() Stain
is designed to work with selections. If you apply Stain without a selection
(when the Ring Stain check box is cleared) the stain will cover
your entire image, producing an underwhelming effect.
Stain
is designed to work with selections. If you apply Stain without a selection
(when the Ring Stain check box is cleared) the stain will cover
your entire image, producing an underwhelming effect.
![]() In
defiance of the above edict, apply stain to an entire image, with the Ring
Stain check box cleared to create a picture frame.
In
defiance of the above edict, apply stain to an entire image, with the Ring
Stain check box cleared to create a picture frame.