What is Magic Bullet LUT Buddy?
Magic Bullet LUT Buddy works on a simple idea — you can capture color correction operations by measuring the changes in a set of known pixel values. LUT Buddy draws a complete set of color tables on an image before any color operations are executed. You do your color correction on the image with the tables. Then LUT Buddy reads the changes to the color tables and extracts the difference as a Look Up Table or LUT.
Why did we make LUT Buddy? We feel some essential things should be free in order to move the filmmaking industry forward, and Magic Bullet LUT Buddy was created with the professional colorist in mind. In fact, the plug-in came directly out of the film work of Stu Maschwitz, Creative Director for our Magic Bullet products. LUT Buddy runs in desktop apps like After Effects and FCP, then exports its LUT output to communicate with higher end systems ranging from DaVinci Resolve to Panasonic displays. If you are already using 1D or 3D LUT’s in your workflow, this tool was designed for you to share values between compliant software and devices.
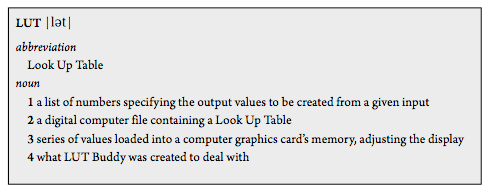
Here are a couple of definitions for LUT.
LUTs in the modern era
What makes a LUT interesting is its portability. A color operation can be created using a any combination of tools and then saved out to a standard LUT file that may be loaded in any number of places that don’t have any such tools. For example, most graphics cards can load a LUT and apply it in real time to the display. However, most graphics cards do not have a built-in Levels plug-in.
These days we’re no longer stuck with 8-bit. Photoshop and After Effects can now work with images that are 16-bit or 32-bit floating point. Unless we make LUTs with 65,536 entries, the day of the LUT must have passed, right? Wrong. When presented a LUT with fewer entries than an image format might dictate, the in-between values are simply interpolated, much as when you insert a few points into the Photoshop curves dialog. Using an 8-bit LUT on a 16-bit image can be a totally valid thing to do.
Read step-by-step tutorial for using LUT Buddy. It's simple and fast.
So... What is a LUT?
To get an idea of what a Look Up Table is, it helps to think back to the day when all computer graphics were, at best, 8-bits-per-channel images. Each pixel has Red, Green and Blue values in the range of 0–255. If you think of applying a standard gamma operation to those RGB values, the formula is:
out = 255 * (in/255)1/gamma
As you can see, this formula involves a couple divides and one power function, which are slow operations on a computer (especially an old one). And since you apply this formula to each channel, a 640x480 image would involve applying it 921,600 times, which could be really slow.
But wait! In our 8-bit world, there are only 256 possible input values, so why not calculate the result for each of these, store them, and then simply look up the answer for every pixel instead of always calculating it fresh? We just saved 921,344 slow calculations. Brilliant.
Example of a LUT
As we have already said, a LUT or simulates what color output will look like. It is mainly used for communicating between color systems that don't have another way of talking.
In particular, a 3D LUT captures sophisticated operations like Lift/Gamma/Gain, Hue offset, Saturation change and color selection. Let’s say you use our Magic Bullet Colorista II plug-in to make color adjustments in Final Cut Pro and you want to move those color decisions to an Autodesk Smoke system. LUT Buddy can capture that information as a .3DL file, and Smoke can open that file to recreate the color changes with very close fidelity. This sharing of information is what LUTs are all about.
To further explain LUTs, let's look at an example of a 1D LUT. Here are the values that make a Look Up Table for an 8-bit Gamma 2.2 operation:
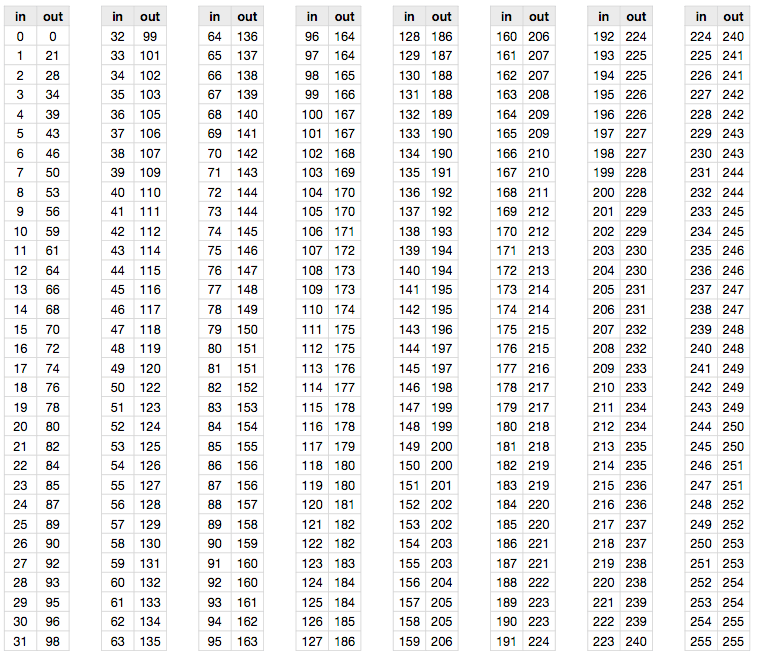
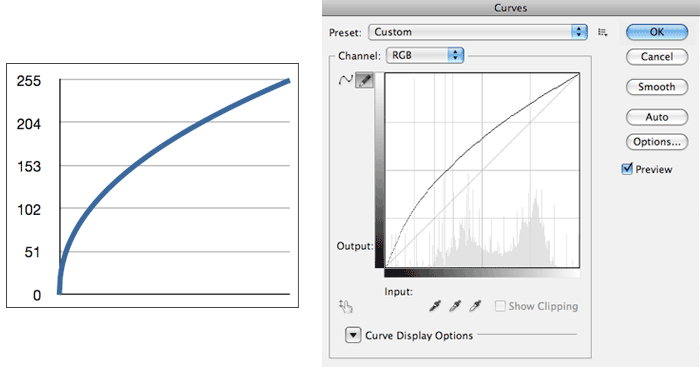
If this 8-bit LUT is graphed, it looks like the chart shown below at left. Which looks a lot like the Photoshop Curves dialog, below right.
That’s right, the Photoshop Curves dialog is just an interface to a LUT. Photoshop internally uses the curve points you set to create a LUT, and then applies that. When you are in Curves pencil mode, you are literally drawing a LUT. (In fact, this screenshot was made by creating a Gamma 2.2 LUT with LUT Buddy and then saving a file to be imported by Photoshop’s Curves dialog, but we are getting ahead of ourselves...)
Does this mean that the Photoshop Curves dialog (and therefore a LUT) can be used to do a Gamma operation? Yes! Any image operation that 1) treats each channel independently and 2) treats each pixel independently can be replicated in Curves. Other candidates include Invert, Levels, and Threshold. Operations like Hue/Saturation do not treat channels independently, so they can’t be replicated in Curves. Operations like Gaussian Blur can’t be replicated in Curves because they’re not pixel-independent.
![]()