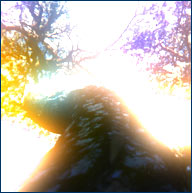
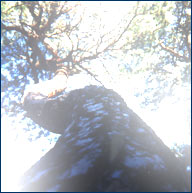
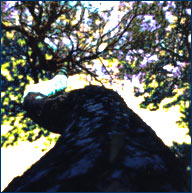
What it does

How to install

Controls

Things to try

Versions

How to Purchase

Questions


Glare


What it does

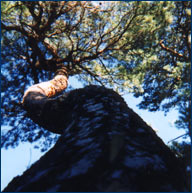
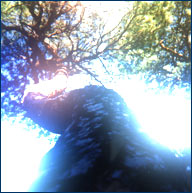
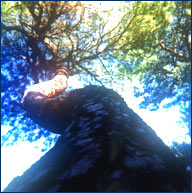
Glare creates glaring haloes around the brightest parts of an image to create an impression of dazzling brightness.


How to install

Illustrated installation instructions are online.

To use this software, you need a paint program which accepts standard Photoshop 3.0 plugins.

Just put the plug-in filter into the folder where your paint program expects to find it. If you have Photoshop, the folder is Photoshop:Plugins:Filters or Photoshop:Plug-ins. You must restart Photoshop before it will notice the new plug-in. It will appear in the menus as Filters->Flaming Pear->Glare.

Most other paint programs follow a similar scheme.

If you have Paint Shop Pro: you have to create a new folder, put the plug-in filter into it, and then tell PSP to look there.

PSP 7:

Choose the menu File-> Preferences-> File Locations... and choose the Plug-in Filters tab. Use one of the "Browse" buttons to choose the folder that contains the plug-in.

The plugin is now installed. To use it, open any image and select an area. From the menus, choose Effects->Plug-in Filters->Flaming Pear->Glare.

PSP 8, 9, and X:

Choose the menu File-> Preferences-> File Locations... In the dialog box that appears, choose Plug-ins from the list. Click "Add." If you are using PSP 8 or 9, click "Browse". Now choose the folder that contains the plug-in.

The plugin is now installed. To use it, open any image and select an area. From the menus, choose Effects->Plugins->Flaming Pear->Glare.


Controls

When you invoke Glare, a dialog box will appear:
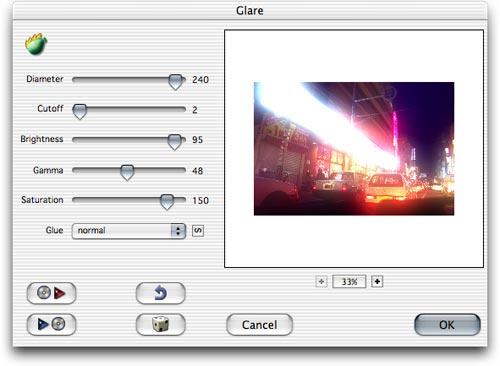

Quick start

   
If you just want to see some effects quickly, click the dice button until you see something you like; then click OK.

Using the dice is the easiest way to use Glare. If you want to hand-tune your own effects, it helps to learn the controls, which are explained below.


dice


Sliders


Glare has five main controls to produce bright haloes.

Diameter sets the size of the haloes.

Cutoff specifies how bright parts of the image have to be before they start contributing to the haloes. At the maximum value, almost nothing will glare. At the minimum value, even quite dark regions will act as if they are glowing. The proper value to use varies from image to image.

Brightness simply sets the basic brightness of the glare.

Gamma influences how rapidly the brightness of the haoles falls off from the center to the edges. Lower values will produce slower falloff, making the whole picture appear brighter.

Saturation says how strongly colored the haloes are. Surrealistic effects are possible by setting using the very highest and lowest values. The central setting of zero will produce colorless grey haloes.


Things to try


1. Basic glare.

With this view up the trunk of a tree, these settings produce a straightforward glare effect:

Diameter 150
Cutoff 60
Brightness 90
Gamma 75
Saturation 100
Glue normal.

If you click the dice button to see various random effects, this is the sort of thing you will see most often.

You can use this tree image (just drag it off the web page) to test the Cutoff control. At a Cutoff value of 98, only the patches of sky will glow. At values near zero, everything but the trunk will glow.


2. Less glare, stronger colors.

Reduce Brightness and increase Saturation to the max. Now the hues are less washed out.


3. Weird colors.

Raise Brightness again and reduce Saturation to -200. You'll get reversed colors in the haloes.


4. White haze.

Increase Diameter to the max and set Saturation to zero. This will prodce a broad haze over the whole picture.


5. Speckles.

Use a very small Diameter of about 6 and turn Brightness and Gamma far up. You'll see tiny, unrealistic blotches of glare.

For more strange-looking variations, try using glue modes other than "normal" with this effect.


Other controls

 
Dice The dice choose a random effect. Click as much as you want to see different effects.

Glue mode popup menu Lets you combine the result with the underlying image in various ways. Modes other than "normal" produce special effects. The next-glue button advances to the next glue mode.

Plus, % and minus buttons: These zoom the preview in and out. Drag the preview to move it.

Load preset Glare comes with some presets, which are files containing settings. To load one, click this button and browse for a preset file.

Save preset When you make an effect you like, click this button to save the settings in a file. 

Undo backs up one step.

OK  Applies the effect to your image.

Cancel  Dismisses the filter, and leaves the image unchanged.


dice


next glue


load preset


save preset


undo


Versions

Version 1.55 June 2007

Fixes a problem where the plug-in wouldn't remember its registration when it was installed in one user account but activated in another.

Version 1.4 July 2004

Works in 16-bit color.

Version 1.3 December 2003

Recordable as a Photoshop action.

Version 1.25 September 2003

Adds more glue modes and the next-glue button.

Version 1.22 February 2003

Adds more glue modes and fixes a crash that could happen when using the menus under Windows XP.

Version 1.21 December 2002

Adds new glue modes: Color, Luminance, Linear Light, and Pin Light. Fixes the appearance of text in the interface when running under Mac OS X 10.2.3 .

Version 1.2 February 2002

Adds previews in the preset browser.

Version 1.1 September 2001

Adds an Undo button.

Version 1.0 September 1999

First release. 


How to Purchase

You can place an order online here. A secure server for transactions is available.


Questions

Answers to common technical questions appear on the support page.

For bug reports and technical questions about the software, please write to support@flamingpear.com .