|
What it does
How to install
Controls
Things to try
Versions
How to Purchase
Questions
|
 |
Lacquer
What it does
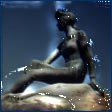
Lacquer produces shiny, glittery, glossy, sparkly results from nearly any image, with results that range from metallic to resinous to wet to weird.
How to install
Illustrated installation instructions are online.
To use this software, you need a paint program which accepts standard
Photoshop 3.0 plugins.
Just put the plug-in filter into the folder where your paint program
expects to find it. If you have Photoshop, the folder is Photoshop:Plugins:Filters or Photoshop:Plug-ins. You must restart
Photoshop before it will notice the new plug-in. It will appear
in the menus as Filters->Flaming Pear->Lacquer.
Most other paint programs follow a similar scheme.
If you have Paint Shop Pro: you have to create a new folder, put the plug-in filter into it, and then tell PSP to look there.
PSP 7:
Choose the menu File-> Preferences-> File Locations... and choose the Plug-in Filters tab. Use one of the "Browse" buttons to choose the folder that contains the plug-in.
The plugin is now installed. To use it, open any image and select an area. From the menus, choose Effects->Plug-in Filters->Flaming Pear->Lacquer.
PSP 8, 9, and X:
Choose the menu File-> Preferences-> File Locations... In the dialog box that appears, choose Plug-ins from the list. Click "Add." If you are using PSP 8 or 9, click "Browse". Now choose the folder that contains the plug-in.
The plugin is now installed. To use it, open any image and select an area. From the menus, choose Effects->Plugins->Flaming Pear->Lacquer.
Controls
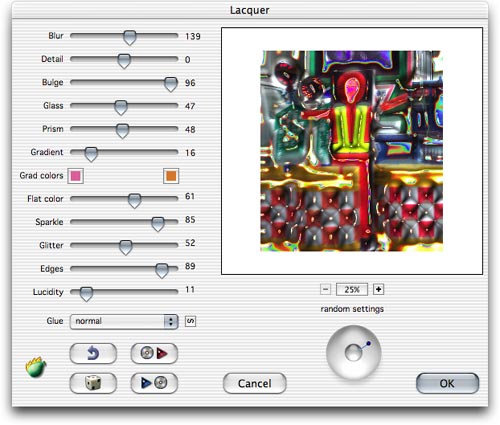
When you invoke Lacquer, a dialog box will appear:
Quick start
|
|
|
|
| If you just want to see some effects quickly, click the dice button
until you see something you like; then click OK.
Using the dice is the easiest way to use Lacquer. If you want to hand-tune your own effects, it helps to learn the controls, which are explained below. |
|

dice |
|
Sliders
|
|
|
|
|
Lacquer builds a 3D surface from the brightness of your image and then lights this surface in several ways.
Blur controls the shape of the surface. Large blurs produce a smoothly rolling surface; small blurs produce sharper details.
Detail controls the amount of fine detail in the surface.
Bulge controls how high the bulges are. Generally, small values of bulge will make all the lighting effects more subtle.
Glass makes the surface look glassy.
Prism produces rainbow reflections.
Gradient produces metallic reflection.
The Grad colors buttons specify the hues of the metallic reflections. The left button is the color of the reflection on upward-facing surfaces, and the right button is the color of downward-facing surfaces.
Flat color controls the amount of the original image that appears in the output.
Sparkle produces tiny highlights when Glass is high.
Glitter makes shiny white highlights on the surface.
Edges produces bright lines that follow the curvature of the surface.
Lucidity gives stark contrast and more saturated colors.
Light Direction is the ball-shaped control. Changing the light direction will make the highlights and sparkle move around in response.
|
|
|
|
Things to try
|
|
|
|
|
Try loading the settings files that come with Lacquer to see what it can do, or click the dice until you see something you like.
Here are some example effects that you can do. Open a favorite picture for these examples -- you won't see anything if you start with a blank canvas. Select part of the picture, and invoke Lacquer.
|
|
|
|
|
|
|
|
|
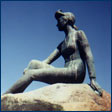
1. Metal.
Set Blur to 40, Detail to 100, Bulge to 100, and Gradient to 100. Chose pale yellow for both grad Colors, and set all the other sliders to zero.
This gives you a basic metallic reflection. If you want smoother reflections, reduce Detail and adjust Blur to your liking.
|
|
 |
|
|
|
|
|
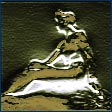
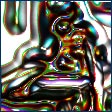
| 2. Simple embossing.
Set Blur to 40, Detail to 100, Bulge to 100, and Flat Color to 100. All the other sliders should be zero.
Your picture should have an embossed 3D look. Adjust the Blur, Detail, and Bulge sliders to tune the appearance.
|
|
 |
|
|
|
|
|
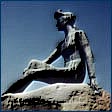
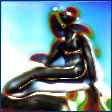
| 3. Glitter.
Use the settings from example #2 above, but then turn up the Glass, Gradient, Sparkle, Glass, and Glitter sliders.
You will see a glossy result. Move the ball control around to change the lighting.
|
|
 |
|
|
|
|
|
| 4. Strange patterns.
Click the dice button a few times until you see any glossy, smooth, lumpy effect. Apply it to your image.
Then re-apply four or five more times. Feedback will produce rows of smooth ridges which will gradually obliterate the original image if applied enough times.
|
|
 |
|
|
|
|
|
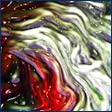
| 5. Lacquering.
Lacquer can produce abstractions from the output of other filters like Twist and Silver. Here, a basic streaky pattern made with Twist has gained a 3D look by using Lacquer with glassy settings.
|
|
 |
|
Other controls
|
|
|
|
| Dice The dice choose a random effect. Click as much as you want to
see different effects.
Glue mode popup menu Lets you combine the result with the underlying image in various ways. Modes other than "normal" produce special effects. The next-glue button advances to the next glue mode.
Plus, % and minus buttons: These zoom the preview in and out. Drag the preview
to move it.
Load preset Lacquer comes with some presets, which are files containing settings. To load one, click this button and browse for a preset file.
Save preset When you make an effect you like, click this button to save the
settings in a file.
Undo backs up one step.
OK Applies the effect to your image.
Cancel Dismisses the filter, and leaves the image unchanged. |
|
dice

next glue

load preset

save preset

undo
|
|
|
Versions
Version 1.55 June 2007
Fixes a problem where the plug-in wouldn't remember its registration when it was installed in one user account but activated in another.
Version 1.4 July 2004
Works in 16-bit color. Fixes a crash that sometimes happened when blur was set to small values.
Version 1.3 December 2003
Recordable as a Photoshop action.
Version 1.25 September 2003
Adds more glue modes and the next-glue button.
Version 1.22 February 2003
Adds more glue modes and fixes a crash that could happen when using the menus under Windows XP.
Version 1.21 December 2002
Adds new glue modes: Color, Luminance, Linear Light, and Pin Light. Fixes the appearance of text in the interface when running under Mac OS X 10.2.3 .
Version 1.2 February 2002
Adds previews in the preset browser.
Version 1.1 September 2001
Adds an Undo button.
Version 1.0 September 1999
First release.
|
|
|
|
How to Purchase
You can place an order online here. A secure server for transactions is available.
Questions
Answers to common technical questions appear on the support page.
For bug reports and technical questions about the software, please
write to support@flamingpear.com .
|